

Last Updated: October 28, 2026
Quick Summary
Speaker alignment means positioning and tuning two speakers so sound reaches your ears at the same time and the same volume. Start with an equilateral triangle, match wall distances and toe-in, then fix placement, level and timing errors in that order. Add delay to the closer speaker so both arrivals match.
- Your head and the two speakers should form an equilateral triangle with equal sides.
- Point both speakers at a spot just behind your head, not directly at your nose.
- Sound travels roughly 34 centimetres per millisecond, so a 34 cm difference equals about 1 ms of delay.
- Add delay to the closer speaker, not the farther one, to match arrival times.
- A level difference of more than about 1-2 dB usually pulls the phantom center.
Table of Contents
- Why Speaker Alignment Makes or Breaks Your Sound
- Stereo Speaker Placement: Building the Right Foundation
- Setting the Speaker Toe-In Angle for Focused Imaging
- How to Time-Align Speakers for Precise Timing
- Speaker Alignment Tools and Measurement Options
- Balancing Left and Right Levels and Checking Symmetry
- Troubleshooting Common Alignment Problems
- Applying Speaker Alignment to Your Bedtime Listening Setup
- Frequently Asked Questions
Why Speaker Alignment Makes or Breaks Your Sound
Speaker alignment is the practice of positioning and tuning two speakers so sound reaches your ears at the same time and the same volume. Get it right, and a pair of modest speakers can image beautifully. Get it wrong, and even expensive gear sounds muddled.
Here's the core problem: your brain locates sound by comparing what each ear hears. Tiny differences in timing and level become a phantom center, the illusion of a voice floating between the speakers. Shift one speaker a few centimetres and that center drifts.
Most guides treat alignment as a one-time setup. It isn't. Speakers creep, furniture moves, and headbands slide. The skill worth learning is how to keep speakers aligned over time, not just how to place them once.
Stereo Speaker Placement: Building the Right Foundation
Everything downstream depends on where the speakers physically sit. Fix placement before you touch a single setting.
The Equilateral Triangle and Listening Position
Start with an equilateral triangle. Your head and the two speakers should form three points of a triangle with equal sides. If the speakers are two metres apart, your ears should be two metres from each one.
This geometry gives you the widest stable sweet spot. Sit too close and the image collapses. Sit too far back and the center thins out.
Mark your main seating position on the floor. Then mark each speaker's front edge. Those three marks are your reference points for every future check.
Distance from Front and Side Walls
Walls matter as much as the triangle. Keep both speakers the same distance from the wall behind them. Even a few centimetres of difference skews the bass and pulls the phantom center to one side.
Side walls are just as fussy. If one speaker sits close to a side wall and the other doesn't, reflections arrive at different times. That's asymmetrical placement, and it's the most common cause of off-center imaging.
In an asymmetric room, you can't always match both distances. Prioritize matching the front wall gap, then use level and delay adjustments to compensate for the side wall difference.
Setting the Speaker Toe-In Angle for Focused Imaging
Toe-in is the angle you rotate each speaker inward toward the listening position. It controls how much direct sound versus reflected sound reaches your ears.
Point both speakers at a spot just behind your head, not directly at your nose. This widens the sweet spot slightly and keeps the stereo image stable when you move.
Small changes matter here. Rotate each speaker in small increments, listen, then rotate again. A common mistake is over-angling, which narrows the soundstage until the speakers sound like two separate boxes.
Both speakers must be toed in by the same amount. Measure the angle from the front wall to each cabinet face, or use a simple trick: run a taut string from each tweeter to your listening position and compare the angles.
How to Time-Align Speakers for Precise Timing
Time alignment means making sound from both speakers arrive at your ears simultaneously. Physical distance differences cause timing errors. Digital delay settings can correct them. This is the step most placement guides skip, and it's the one that separates a good setup from a locked-in one.
First, separate the three problems. Placement errors are physical. Level errors are volume. Timing errors are arrival time. Fix them in that order, because a timing tweak can't rescue a badly placed speaker, and a level tweak can't fix a delay.
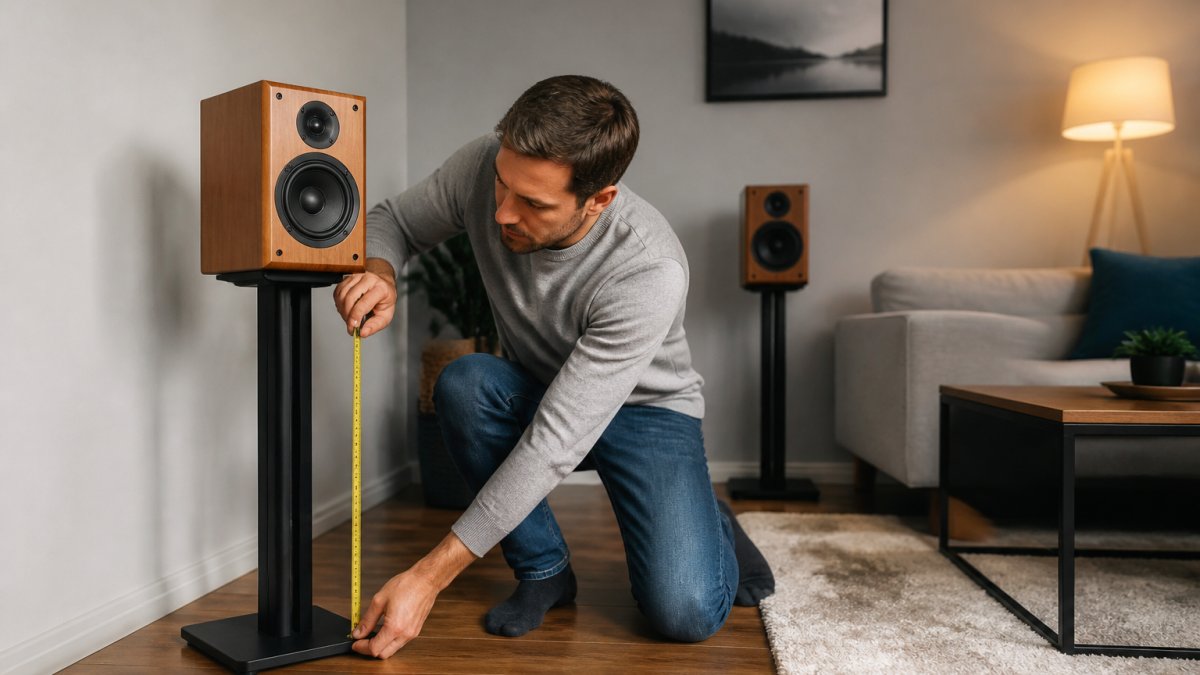
- Measure from each tweeter to your listening position. Use a tape measure or laser distance meter and write both numbers down.
- Subtract the smaller distance from the larger. The difference is your timing error in centimetres or inches.
- Convert that difference to time. Sound travels roughly 34 centimetres per millisecond, so a 34 cm difference equals about 1 ms of delay. Most receiver and DSP menus let you enter either distance or milliseconds; use whichever your system displays.
- Add delay to the closer speaker, not the farther one. You are slowing the early arrival to match the late one.
- Re-measure and confirm both distances match, or that the delay value equals your calculated difference.
- Listen to a mono vocal track and check that the center locks before moving on.
If your setup has no delay controls, physical positioning is your only tool. Move the closer speaker back until both distances match. This is slower and less precise, but it works.
A common mistake is adding delay to the wrong speaker. If the center pulls toward the closer speaker, you've delayed the farther one. Reverse the values and listen again. Another mistake is setting delay by ear without measuring first; ears are good at confirming a locked center but poor at estimating milliseconds.
Once delay is set, verify it holds. Play a familiar mono recording and walk slowly from the center seat toward each side. The phantom center should stay stable until you move well off-axis. If it collapses immediately, recheck your measurements and confirm both speakers are toed in by the same amount. Maintaining this precise spatial consistency ensures that you can reliably check mix balance before finalizing your work.
Speaker Alignment Tools and Measurement Options
You don't need a lab, but you do need more than your ears. A tape measure, a laser distance meter, and a phone sound level app cover most of the work. For deeper verification, a measurement microphone and room-analysis software can map what's actually happening at the listening position.
- Tape measure or laser distance meter. Measure from each tweeter to your listening position and write both numbers down. Check front-wall and side-wall gaps for each speaker. If the two sides differ by more than a couple of centimetres, fix placement before touching any settings.
- SPL meter or phone sound level app. Play a mono test tone or pink noise through one channel at a time and compare readings at the listening position. A difference of more than about 1-2 dB usually pulls the phantom center. Match levels, then recheck the center with a mono vocal track.
- Measurement microphone and room-analysis software. Place the mic at the listening position, run a sweep, and look at the impulse response or step response. A clear, single arrival spike means timing is close. A smeared or double spike suggests a distance mismatch or a strong reflection.
- Test tones and reference tracks. Use a mono vocal or a centered bass line to confirm the phantom center. Use a familiar track with strong left-right separation to check that the image doesn't collapse when you move slightly off-axis.
Use the readings to separate problems rather than guess. If the center pulls left but both distances match, check levels. If levels match but the image smears, check toe-in. If the bass is stronger on one side, check front-wall distance. If sound seems late from one side, check distance and delay. Working through the tools in this order keeps you from adjusting two variables at once.
Balancing Left and Right Levels and Checking Symmetry
Volume balance is the last adjustment, and it's the one people skip. Set both channel levels to equal, then sit in your main position and listen to a mono recording. The sound should come from a single point directly ahead.
If the phantom center pulls left or right, adjust one channel by small increments until it locks. Then verify symmetry: equal speaker spacing, equal toe-in, equal wall distances where possible.
Troubleshooting Common Alignment Problems
| Symptom | Likely Cause | Fix |
|---|---|---|
| Phantom center pulls to one side | Unequal channel levels | Match levels, then recheck |
| Image sounds vague or smeared | Toe-in mismatch | Measure and match both angles |
| Bass stronger on one side | Unequal front wall distance | Move the closer speaker back |
| Sound arrives late from one side | Distance mismatch | Match distances or add delay |
| Center drifts when you move | Sweet spot too narrow | Reduce toe-in slightly |
Watch out: adjusting two variables at once makes it impossible to know which change fixed the problem. Change one thing, listen, then move on.
If your speakers keep shifting, the fit is the issue, not the settings. how sleep headband speakers stay in place covers fit fixes that hold alignment overnight.
Applying Speaker Alignment to Your Bedtime Listening Setup
Bedtime listening changes the rules. You're lying on your side, one ear against a pillow, and the speakers are millimetres from your head. Standard room alignment advice doesn't map cleanly.
buying guide for light sleepers and our comparison of headphones for side sleepers both cover what to look for. explore the SleepBandZ sleep headphone collection or go straight to SleepBandZ wireless sleep headphones with their soft, ultra-thin speakers built for side sleepers.
SleepBandZ offers wireless sleep headphones with ultra-thin, soft speakers integrated into a cozy headband. They are designed for side sleepers and use Bluetooth technology and USB charging. The headphones help block out snoring and ambient noise.
Frequently Asked Questions
How do I know if my speakers are aimed correctly?
Sit in your main listening position and listen to a familiar track with a centered vocal. If the voice sounds like it comes from directly in front of you, the speakers are aimed well. If it pulls left or right, adjust the toe-in angle one speaker at a time. Small changes of a few degrees can shift the phantom center noticeably, so move in small increments and recheck.
Should both speakers be the same distance from the listening position?
Yes, in almost every setup. Equal distance keeps the left and right channels arriving at the same time, which preserves stereo imaging and a stable center image. Use a tape measure from each tweeter to your ear position. If one speaker must sit closer due to room layout, use a delay setting in your receiver or software to time-align speakers electronically.
How do you align speakers in an asymmetrical room?
Start with the equilateral triangle and equal distances, then accept that side walls will affect reflections. Pull both speakers slightly away from the nearest side wall, keep the listening position centered between them, and use toe-in to reduce the strongest early reflection. Measurement tools or room-correction software can help balance the remaining differences, but physical symmetry remains the priority.
Why do my speakers sound unbalanced even after I position them?
Unbalanced sound usually comes from three sources: level differences, timing differences, or placement differences. Check channel levels first with a test tone or your receiver's calibration menu. Then confirm both speakers are the same distance from your ears. Finally, inspect the room for nearby walls or furniture that reflect sound more on one side. Fixing each cause in that order solves most imbalance issues.
